" height="32.00002387147419px" id="gZXGZYql_" transform="translate(0 0)" width="33.17407881260548px"/><path d="M 2.085 0 C 2.398 0.09 2.616 0.346 2.862 0.551 C 4.463 1.882 5.328 4.198 4.692 6.221 C 4.23 7.692 2.854 8.429 1.559 9.077 C 0.984 9.294 0.604 9.374 0 9.506 C 1.261 7.006 2.053 5.972 0.077 3.616 C 0.93 2.522 1.608 1.302 2.085 0 Z" fill="rgb(255, 255, 255)" height="9.505700000000001px" id="cmY0ROQXE" transform="translate(26.962 11.764)" width="4.902088461320112px"/><path d="M 2.786 0.079 C 4.516 -0.195 6.882 0.235 8.153 1.529 C 9.314 2.711 9.449 4.074 9.45 5.641 L 8.055 4.448 C 7.13 3.7 6.366 3.236 5.22 2.863 C 2.88 2.103 1.689 2.46 0 0.491 C 0.949 0.332 1.831 0.191 2.786 0.079 Z" fill="rgb(255, 255, 255)" height="5.640822256039236px" id="QF25qHlEr" transform="translate(19.227 1.379)" width="9.450099999999999px"/><path d="M 5.655 0 C 5.917 0.113 5.862 0.633 5.911 1.004 C 6.04 2.045 6.387 3.046 6.929 3.943 C 5.131 4.63 3.592 5.19 1.733 4.47 C 0.726 3.926 0.319 3.27 0 2.213 C 2.759 1.595 3.154 1.371 5.655 0 Z" fill="rgb(255, 255, 255)" height="4.806175899027007px" id="kqgl_H_Bc" transform="translate(10.595 23.332)" width="6.928799999999999px"/><path d="M 0 0 C 0.65 0.017 1.138 0.041 1.491 0.654 C 3.245 3.701 4.719 4.269 8.278 3.546 C 7.879 3.861 7.49 4.137 7.076 4.431 C 6.222 4.957 5.254 5.271 4.254 5.345 C 1.023 5.561 0.155 2.656 0 0 Z" fill="rgb(255, 255, 255)" height="5.356585200702476px" id="A5o1AXt5e" transform="translate(7.901 25.553)" width="8.277719999999999px"/><path d="M 1.582 0 C 1.889 0.239 1.638 0.793 1.582 1.267 C 1.337 3.362 1.705 4.763 2.654 6.583 C 2.182 7.09 1.586 7.662 1.092 8.161 L 0.98 8.239 L 0.826 8.184 C -0.289 5.719 -0.489 2.026 1.582 0 Z" fill="rgb(255, 255, 255)" height="8.23884px" id="K4X1nlNhw" transform="translate(1.373 8.977)" width="2.6544824443243806px"/><path d="M 4.879 0 L 5.154 0.02 C 5.173 0.055 5.191 0.089 5.21 0.124 C 4.076 1.11 3.076 1.841 2.163 3.07 C 0.899 4.77 1.042 6.073 0.594 7.936 C -0.71 7.351 0.477 3.227 0.911 2.183 C 1.385 1.046 3.753 0.398 4.879 0 Z" fill="rgb(255, 255, 255)" height="7.93632px" id="iX1WuEJsS" transform="translate(4.258 5.422)" width="5.209503656189256px"/><path d="M 0.891 0 C 1.252 0.397 0.785 0.972 2.043 1.993 C 3.579 2.288 5.164 2.203 6.66 1.745 C 6.19 2.232 5.777 2.59 5.268 3.03 C 5.209 3.074 5.149 3.118 5.09 3.162 C 3.442 4.368 1.179 3.903 0 2.267 C 0.206 1.503 0.429 0.651 0.891 0 Z" fill="rgb(255, 255, 255)" height="3.840138803869854px" id="EYhSkzb98" transform="translate(10.639 14.254)" width="6.660399999999999px"/><path d="M 5.7 0 L 5.862 0.129 C 5.871 0.163 5.899 0.278 5.896 0.313 C 5.7 2.553 3.858 4.223 1.838 4.943 C 1.312 5.131 0.79 5.181 0.227 5.231 C 0.062 5.156 0.114 5.18 0 5.006 C 0.058 4.568 2.368 2.938 2.85 2.535 C 3.828 1.716 4.745 0.832 5.7 0 Z" fill="rgb(255, 255, 255)" height="5.230699999999999px" id="rR3aItzbE" transform="translate(20.021 22.535)" width="5.895938333146585px"/><path d="M 1.798 0.061 C 2.392 -0.019 3.597 -0.071 4.125 0.244 C 4.638 0.944 4.484 2.507 3.821 3.106 C 3.426 3.233 3.583 3.227 3.161 3.071 C 2.323 2.592 0.895 1.713 0 1.493 C 0.65 0.799 0.954 0.488 1.798 0.061 Z" fill="rgb(255, 255, 255)" height="3.1951027036145305px" id="IMle10bWj" transform="translate(15.146 10.535)" width="4.430712176398055px"/><path d="M 0.018 0 C 0.282 0.063 1.864 1.126 2.331 1.364 C 3.197 1.804 3.346 1.876 4.34 2.173 C 4.251 2.864 4.215 3.588 4.169 4.285 C 3.236 4.526 0.886 2.837 0.45 1.956 C 0.031 1.109 -0.041 0.914 0.018 0 Z" fill="rgb(255, 255, 255)" height="4.308168324411934px" id="pheoyshQj" transform="translate(2.312 19.986)" width="4.339817240842605px"/><path d="M 0 0.027 C 0.439 0.014 1.2 -0.035 1.608 0.043 C 3.315 0.369 2.426 2.559 2.106 3.651 C 2.035 3.895 2.003 4.098 1.809 4.257 C 0.598 4.238 0.09 0.995 0 0.027 Z" fill="rgb(255, 255, 255)" height="4.257278283966036px" id="y4SOtrApl" transform="translate(22.564 5.982)" width="2.6241732006357594px"/><path d="M 2.53 0 C 3.199 0.233 4.697 4.443 1.642 3.339 C 0.801 2.889 0.575 2.665 0 1.9 C 0.709 1.252 1.74 0.538 2.53 0 Z" fill="rgb(255, 255, 255)" height="3.5230979695442386px" id="taMdD9ETv" transform="translate(22.166 17.775)" width="3.4914692646924834px"/><path d="M 1.922 0 L 2.08 0.004 C 2.445 0.65 1.939 4.817 0.934 5.155 L 0.716 5.046 C -0.285 2.784 -0.525 1.194 1.922 0 Z" fill="rgb(255, 255, 255)" height="5.154800000000002px" id="udg1KI2m_" transform="translate(17.619 21)" width="2.1985109419737654px"/><path d="M 0.58 0 C 0.964 0.148 2.564 1.331 3.056 1.648 L 1.563 3.194 C 0.988 3.708 0.635 3.938 0 4.353 C 0.455 2.537 0.619 1.856 0.58 0 Z" fill="rgb(255, 255, 255)" height="4.353200000000001px" id="hiTtHQeFA" transform="translate(20.577 20.867)" width="3.055799999999998px"/><path d="M 0.966 0 C 1.582 0.047 3.874 0.689 3.937 1.412 C 3.75 1.663 3.405 1.698 3.09 1.773 C 2.282 1.958 0.27 2.516 0 1.461 C 0.092 0.94 0.569 0.343 0.966 0 Z" fill="rgb(255, 255, 255)" height="2.0860744736189787px" id="opNh2nfUr" transform="translate(13.15 13.09)" width="3.9368px"/><path d="M 3.076 0 L 3.294 0.079 L 3.342 0.207 C 2.908 1.051 2.415 1.797 1.984 2.692 C 1.434 3.834 1.003 5.282 0.264 6.258 C 0.071 6.168 0.14 6.22 0.007 6.032 C -0.126 4.485 1.706 0.885 3.076 0 Z" fill="rgb(255, 255, 255)" height="6.258489999999999px" id="EXvZ1NrdY" transform="translate(5.901 7.504)" width="3.3417542024784233px"/><path d="M 1.308 0 C 1.265 -0.04 2.536 3.529 2.776 4.008 C 2.361 3.821 2.001 3.628 1.6 3.413 C -0.431 2.074 -0.528 1.77 1.308 0 Z" fill="rgb(255, 255, 255)" height="4.007940350226239px" id="p5Vi1bLFm" transform="translate(3.356 16.691)" width="2.7756652348500186px"/><path d="M 0.588 0 C 0.712 0.037 0.813 0.085 0.929 0.142 C 1.465 0.403 1.872 0.872 2.054 1.44 C 2.263 2.103 2.018 2.498 1.384 2.679 L 0 3.028 C 0.272 2.132 0.442 0.93 0.588 0 Z" fill="rgb(255, 255, 255)" height="3.0282500000000008px" id="V_zCzpfyC" transform="translate(25.759 6.998)" width="2.126652647905342px"/><path d="M 2.102 0 C 2.802 0.107 3.532 0.768 4.104 1.212 C 2.902 1.364 2.267 1.509 1.163 2.011 C 0.824 2.209 0.36 2.545 0 2.48 C 0.031 1.997 1.687 0.41 2.102 0 Z" fill="rgb(255, 255, 255)" height="2.4884510228622325px" id="KgZLUphip" transform="translate(11.2 5.676)" width="4.1045px"/><path d="M 4.112 0.034 C 4.292 -0.019 4.317 -0.009 4.495 0.055 L 4.521 0.223 C 4.183 0.728 0.99 2.723 0.316 3.048 C 0.138 3.125 0.208 3.106 0 3.08 C 0.021 1.932 3.087 0.317 4.112 0.034 Z" fill="rgb(255, 255, 255)" height="3.1028650031226688px" id="qq3hk8yZK" transform="translate(10.785 7.828)" width="4.521000000000001px"/><path d="M 0.141 0.077 C 0.594 0.026 1.199 -0.069 1.623 0.081 C 2.341 0.337 3.29 0.695 3.403 1.535 L 3.219 1.757 C 2.961 1.841 2.676 1.923 2.409 1.857 C 1.834 1.715 0.306 0.711 0 0.221 Z" fill="rgb(255, 255, 255)" height="1.8810147921990854px" id="JXpIE1opf" transform="translate(15.32 4.703)" width="3.402700000000001px"/><path d="M 2.72 0.04 C 3.046 -0.001 3.15 -0.015 3.474 0.019 C 3.811 0.283 3.818 0.442 3.722 0.835 C 3.251 1.286 1.932 1.16 1.172 1.177 C 0.817 1.19 0.234 1.272 0 0.991 C 0.298 0.535 2.175 0.141 2.72 0.04 Z" fill="rgb(255, 255, 255)" height="1.1983903643415106px" id="QP7_JZRtq" transform="translate(8.995 3.061)" width="3.775186453050104px"/><path d="M 0.193 0.028 C 1.37 0.006 2.502 -0.021 3.681 0.027 C 3.223 0.275 2.628 0.465 2.13 0.642 C 1.505 0.923 0.737 1.461 0.147 1.026 C -0.012 0.632 -0.1 0.34 0.193 0.028 Z" fill="rgb(255, 255, 255)" height="1.189605127915172px" id="hp2lulSqL" transform="translate(9.97 23.156)" width="3.6805205061196204px"/><path d="M 1.023 0.05 C 1.923 -0.054 2.723 0.02 3.611 0.123 C 3.049 0.38 2.64 0.478 2.041 0.637 C 1.403 0.827 0.635 0.996 0.014 0.719 L 0 0.546 C 0.275 0.253 0.639 0.176 1.023 0.05 Z" fill="rgb(255, 255, 255)" height="1px" id="BmzCHBA2O" transform="translate(12.984 20.51)" width="3.610699999999998px"/><path d="M 0.008 0 C 0.119 0.008 0.23 0.024 0.339 0.046 C 1.337 0.256 1.337 1.625 1.15 2.409 C 0.376 2.243 -0.065 0.695 0.008 0 Z" fill="rgb(255, 255, 255)" height="2.4094000000000015px" id="tsSE_BCay" transform="translate(25.73 16.309)" width="1.2458836048739457px"/><path d="M 1.441 0 C 1.549 0.032 1.598 0.072 1.694 0.13 C 1.849 0.779 0.893 1.983 0.316 2.281 C -0.694 1.786 1.001 0.423 1.441 0 Z" fill="rgb(255, 255, 255)" height="2.2813999999999997px" id="mFThfbOIR" transform="translate(24.705 11.035)" width="1.7107771516854555px"/><path d="M 0.141 0 C 1.206 0.231 0.974 1.087 0.864 1.994 C 0.686 1.994 0.499 1.983 0.321 1.976 C -0.202 1.571 0.05 0.579 0.141 0 Z" fill="rgb(255, 255, 255)" height="1.9940006770252907px" id="XFco5JL0X" transform="translate(7.804 22.531)" width="1px"/><path d="M 0.06 0.003 C 0.443 -0.011 0.745 0.019 1.018 0.308 C 1.167 0.605 1.121 0.707 1.042 1.04 C 0.621 1.007 0.402 0.977 0.105 0.675 C -0.03 0.37 -0.023 0.328 0.06 0.003 Z" fill="rgb(255, 255, 255)" height="1.0400327079323755px" id="w2Z9lCByC" transform="translate(16.894 2.666)" width="1.115859328834759px"/><path d="M 0 0.007 C 0.797 -0.068 1.456 0.475 1.871 1.112 C 1.087 1.119 0.44 0.625 0 0.007 Z" fill="rgb(255, 255, 255)" height="1.1116551820404172px" id="kl2V_0pZ0" transform="translate(19.418 7.047)" width="1.8714000000000013px"/><path d="M 0 0 L 11.42 0 L 11.42 1.52 L 6.58 1.52 L 6.58 14.24 L 4.84 14.24 L 4.84 1.52 L 0 1.52 Z M 18.664 12.94 L 19.244 12.94 L 19.244 14.24 C 18.978 14.28 18.684 14.3 18.364 14.3 C 17.284 14.3 16.704 13.807 16.624 12.82 C 15.904 13.927 14.784 14.48 13.264 14.48 C 12.131 14.48 11.238 14.22 10.584 13.7 C 9.944 13.167 9.624 12.42 9.624 11.46 C 9.624 9.593 10.898 8.527 13.444 8.26 L 14.924 8.1 C 16.004 7.98 16.544 7.507 16.544 6.68 C 16.544 6.107 16.364 5.693 16.004 5.44 C 15.658 5.187 15.064 5.06 14.224 5.06 C 13.331 5.06 12.684 5.213 12.284 5.52 C 11.898 5.813 11.678 6.34 11.624 7.1 L 10.024 7.1 C 10.158 4.82 11.558 3.68 14.224 3.68 C 16.811 3.68 18.104 4.68 18.104 6.68 L 18.104 12.44 C 18.104 12.773 18.291 12.94 18.664 12.94 Z M 13.344 13.12 C 14.198 13.12 14.944 12.86 15.584 12.34 C 16.224 11.833 16.544 11.107 16.544 10.16 L 16.544 8.94 C 16.251 9.167 15.798 9.313 15.184 9.38 L 13.684 9.56 C 12.818 9.667 12.198 9.867 11.824 10.16 C 11.464 10.453 11.284 10.873 11.284 11.42 C 11.284 11.953 11.458 12.373 11.804 12.68 C 12.151 12.973 12.664 13.12 13.344 13.12 Z M 25.314 3.68 C 26.767 3.68 27.934 4.167 28.814 5.14 C 29.681 6.127 30.114 7.44 30.114 9.08 C 30.114 10.707 29.681 12.013 28.814 13 C 27.934 13.987 26.767 14.48 25.314 14.48 C 23.834 14.48 22.681 13.907 21.854 12.76 L 21.854 18.16 L 20.254 18.16 L 20.254 3.92 L 21.774 3.92 L 21.774 5.52 C 22.601 4.293 23.781 3.68 25.314 3.68 Z M 25.114 13.04 C 26.114 13.04 26.914 12.68 27.514 11.96 C 28.127 11.227 28.434 10.24 28.434 9 C 28.434 7.787 28.134 6.84 27.534 6.16 C 26.947 5.467 26.141 5.12 25.114 5.12 C 24.101 5.12 23.294 5.467 22.694 6.16 C 22.094 6.853 21.794 7.827 21.794 9.08 C 21.794 10.32 22.094 11.287 22.694 11.98 C 23.294 12.687 24.101 13.04 25.114 13.04 Z M 42.472 3.68 C 43.592 3.68 44.458 4.007 45.072 4.66 C 45.698 5.3 46.012 6.16 46.012 7.24 L 46.012 14.24 L 44.412 14.24 L 44.412 7.4 C 44.412 5.88 43.692 5.12 42.252 5.12 C 41.492 5.12 40.858 5.427 40.352 6.04 C 39.858 6.64 39.612 7.493 39.612 8.6 L 39.612 14.24 L 38.012 14.24 L 38.012 7.4 C 38.012 5.88 37.292 5.12 35.852 5.12 C 35.105 5.12 34.478 5.427 33.972 6.04 C 33.465 6.64 33.212 7.493 33.212 8.6 L 33.212 14.24 L 31.612 14.24 L 31.612 3.92 L 33.132 3.92 L 33.132 5.44 C 33.812 4.267 34.805 3.68 36.112 3.68 C 37.658 3.68 38.718 4.327 39.292 5.62 C 40.012 4.327 41.072 3.68 42.472 3.68 Z M 52.581 8.2 L 54.041 3.92 L 55.781 3.92 L 51.421 15.86 C 51.114 16.727 50.694 17.333 50.161 17.68 C 49.627 18.04 48.927 18.22 48.061 18.22 C 47.767 18.22 47.447 18.2 47.101 18.16 L 47.101 16.82 L 48.041 16.82 C 48.961 16.82 49.587 16.393 49.921 15.54 L 50.281 14.58 L 46.401 3.92 L 48.161 3.92 L 49.621 8.22 C 50.141 9.74 50.634 11.227 51.101 12.68 C 51.487 11.44 51.981 9.947 52.581 8.2 Z" fill="rgb(3, 3, 3)" height="18.220000076293946px" id="glUGDzk9A" transform="translate(38.574 9.76)" width="55.78079879760742px"/></svg>)


" height="21.95706114703747px" id="qM5sFNDIS" transform="translate(3.459 1.023)" width="17.081538493872166px"/></svg>)
" height="16.041644077985946px" id="vPwWmgEb7" transform="translate(2.375 4.207)" width="19.249983003077222px"/></svg>)
" width="20px"><path d="M 0 20 L 0 0 L 20 0 L 20 20 Z" fill="transparent" height="20px" id="Iu2kCeaUT" width="20px"/><path d="M 4.531 6.206 L 0.253 6.206 L 0.253 19.08 L 4.531 19.08 Z M 2.393 4.449 C 3.884 4.449 4.813 3.46 4.813 2.224 C 4.785 0.961 3.884 0 2.421 0 C 0.957 0 0 0.961 0 2.224 C 0 3.46 0.929 4.449 2.364 4.449 Z M 11.178 19.08 L 11.178 11.89 C 11.178 11.506 11.206 11.121 11.319 10.847 C 11.628 10.077 12.333 9.281 13.515 9.281 C 15.063 9.281 15.682 10.462 15.682 12.193 L 15.682 19.08 L 19.961 19.08 L 19.961 11.698 C 19.961 7.744 17.85 5.904 15.034 5.904 C 12.765 5.904 11.747 7.152 11.178 8.029 L 11.178 6.206 L 6.899 6.206 C 6.956 7.414 6.899 19.08 6.899 19.08 Z" fill="rgb(0, 0, 0)" height="19.079659942779543px" id="hzLTqQuQE" transform="translate(0.02 0.461)" width="19.960870207061767px"/></g></svg>)
" height="18px" id="TrPl6m2Z8" transform="translate(1.75 3)" width="20.5px"/></svg>)
Key Takeaways (TL;DR):
Prioritize Intent: Treat the bio link as a high-conversion storefront by focusing on a single, clear lead magnet rather than a fragmented menu of links.
Optimize Microcopy: Use task-oriented verbs like 'Download' or 'Join' combined with specific value propositions to drive clicks.
Reduce Friction: Increase signup rates by using single-field email opt-in forms and ensuring pages load quickly on mobile devices.
Leverage Story Sequences: Use a four-part story formula (Problem → Proof → Lead Magnet → Link Sticker) to drive higher engagement than static feed posts.
Implement Attribution: Use link-in-bio tools that track the specific source of a click (e.g., stories vs. bio) to understand which content actually generates subscribers.
Iterative Testing: Conduct two-week experiments on CTA copy and link layouts to identify the most effective conversion variables for your specific audience.
Why the Instagram bio link converts more reliably than feed traffic — the mechanism behind small creator wins
Profile visits are intent-rich. When someone taps your avatar, they arrive with a short decision window: will they follow you, browse posts, or click your link? The bio link sits at the intersection of attention and intent, and that makes it, in practice, the highest-converting traffic source for email opt-ins on Instagram for creators with 1K–50K followers. Saying it converts "better" is shorthand; the real story is about placement, expectation, and the single-CTA dynamic.
Placement matters because profile visits are a deliberate action. Scrolling past a Reel is passive; tapping an account is active. That activity compresses cognitive load. The bio link—if set up to deliver a single, obvious lead magnet—creates a predictable funnel: profile visit → click → landing page → opt-in. The fewer choices you offer between click and email, the higher the conversion. That’s not theory alone; it’s the behavioral logic behind why "instagram bio link email subscribers" is a repeatable channel for creators who get profile visits but no subscribers.
Expectation plays a role too. Many followers expect a bio link to be transactional: a ticket, a shop, a signup. When your copy and visuals align with that expectation, you trigger an action more readily than with a post caption that competes with algorithmic timing. You can see this in practice: creators who treat the bio link as a single-CTA storefront—where the lead magnet is front and center—systematically beat multi-link pages or vague "linktree" menus at turning visits into subscribers.
But mechanics alone don’t equal conversions. The funnel logic must be explicit and low-friction. If a creator's bio reads like a resume and the link lands on a long page, expect drop-off. A focused path—short headline, clear microcopy, immediate visible opt-in—behaves like a conversion multiplier. For an engineering mind: reduce the decision tree nodes, and the probability of reaching the terminal “email submitted” node rises.
Writing a bio CTA that actually generates clicks and subs: microcopy, intent signaling, and friction reduction
Most creators treat bios as branding real estate. For conversion-focused creators, the bio must function as a directional command calibrated to the visitor's intent. The goal is not to persuade at length; it's to convert curiosity into a click that finds a lead magnet. That requires tight microcopy and explicit expectations.
Start with a task-oriented verb. "Get", "Join", "Download", "Read"—verbs orient behavior. Follow with a clear value proposition that fits a 125-character limit. Avoid vagueness. Instead of "Resources + tips," say "Download my 3-step email template." Pair that copy with a visual cue in your grid (a highlight cover, an actionable Reel) so the brain connects scroll context with the call to action.
Friction is mostly invisible. Long forms, unclear promises, or redirect chains kill conversion. Two examples:
Bad: "Link below" → generic URL shortener → long navigation → opt-in form hidden under CTA copy.
Good: "Free 3-email welcome series — 1 min" → direct landing page with email field above the fold → one click to confirm.
Remove fields. Collect only the email initially. Name can come later in the welcome sequence. The single-field constraint increases completion probability; shorter forms also match mobile ergonomics. If you must validate location or preferences, do it after the initial opt-in via follow-up emails or a progressive profile survey.
Finally, use social proof sparingly and specifically. Instead of "Trusted by thousands," say "100+ creators used this template last month" if you can truthfully track it. Specificity builds credibility without requiring heavy persuasion. Where you can, link the microcopy to a visible asset: a highlight titled "Free guide" or a pinned Reel that demonstrates what the lead magnet delivers.
Link-in-bio architecture: from fragmented menus to a storefront-first layout (trade-offs and why Tapmy's framing matters)
Many creators use multi-link menus to avoid swapping links frequently. That makes sense, but it dilutes conversion. A storefront-first layout flips the mental model: instead of “many choices,” you present a primary offer with secondary options beneath. For email acquisition, the lead magnet must be the primary tile.
There are trade-offs. A single-offer page limits discovery for secondary content (a shop, a course). Multi-link pages increase engagement for followers who want other products but reduce opt-in rates. The decision matrix is straightforward: prioritize subscribers early in the account lifecycle; add secondary tiles as repeat-visitor funnels. You can later rotate the primary tile when launching a paid product, but the first visible item should always answer the question, "How do I get on this creator's list?"
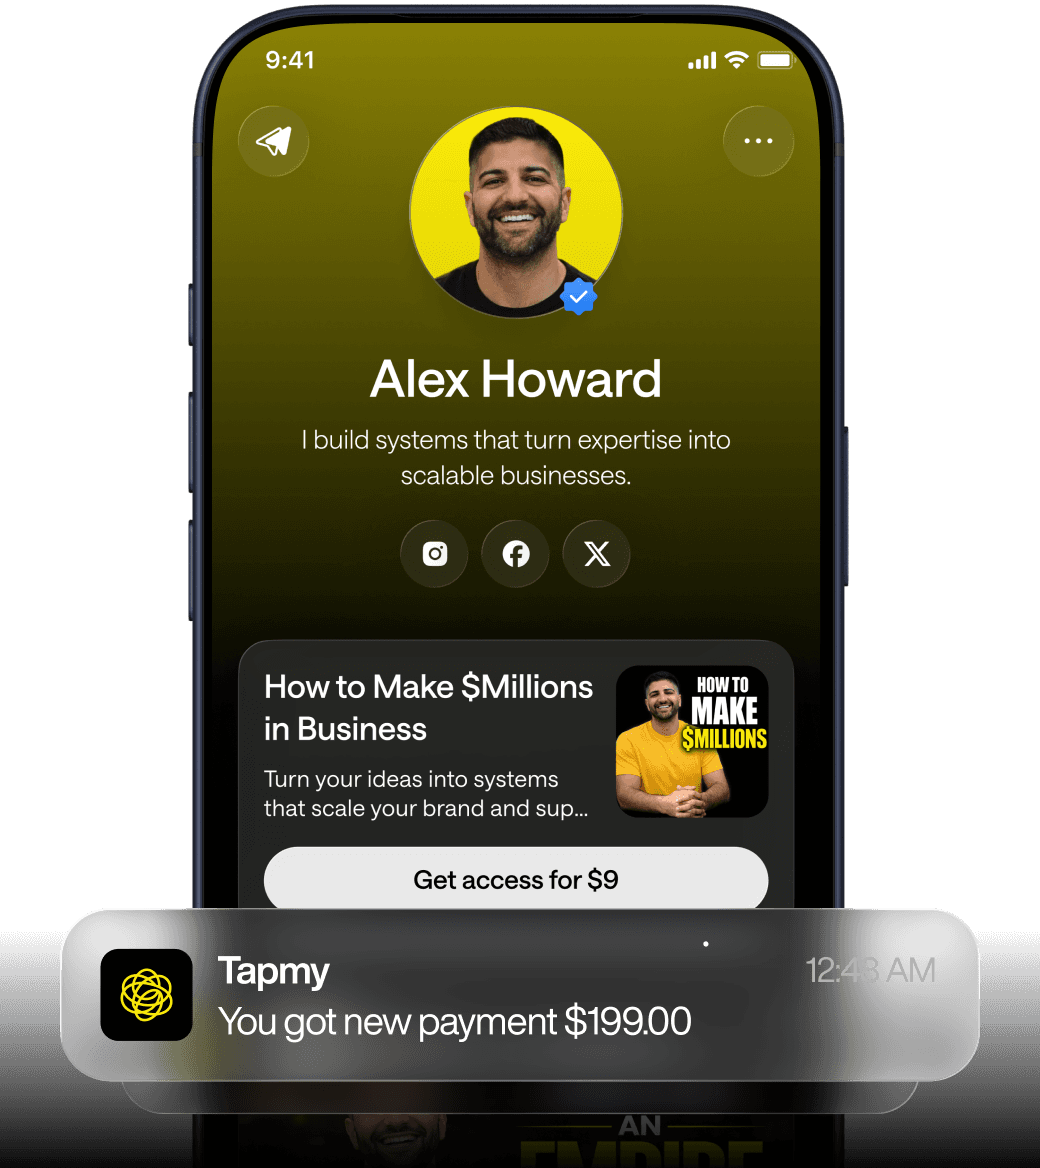
Tapmy's conceptual framing positions the bio area as a monetization layer: attribution + offers + funnel logic + repeat revenue. That perspective changes how you structure links. If your link tool can track source attribution and make your lead magnet the first thing visitors see, you get accurate Instagram-to-subscriber conversion without manual UTM gymnastics. Tracking at source reduces guesswork and informs content decisions—what lands convert better: a Reel, a story, or a profile visit?
Below is a practical decision table that helps choose layout strategy based on follower count, content frequency, and primary goal.
Scenario | Primary goal | Recommended link-in-bio layout | Trade-off |
|---|---|---|---|
Early growth (1K–10K) | Build email list | Single primary tile (lead magnet) + one backup | Lower visibility for shop items |
Active monetization (10K–50K, selling regularly) | Balance sales and list growth | Primary lead magnet + product tiles + archive link | More navigation; opt-in rate drops slightly |
Event-driven launches | Sell a paid offer fast | Primary product tile with email capture as prelaunch | Subscriber flow momentarily deprioritized |
Remember: the visible order signals priority. Put the email lead magnet first. If your tool supports analytics at tile-level, use that metric to justify switching that tile. If it doesn't, estimate by tracking click-throughs from Story stickers or Reels (I'll cover tracking methods later).
Story stickers, Reel pipelines, and the real behavior of mobile users — practical sequences and failure modes
Instagram story link stickers generate more clicks than feed links. Practitioners report 2–5x sticker click volume compared to a single bio link. Why? Stories are ephemeral and direct; the viewer is already in a content-forward mindset and the sticker appears as the next obvious action. But high click volume doesn't automatically translate to subscribers without a coherent sequence.
Construct a story sequence that reduces context-switching. A simple, high-performing pattern:
Story 1 — Set the problem (10–15 seconds)
Story 2 — Quick proof or result (10 seconds)
Story 3 — Show the lead magnet and one screenshot (15 seconds)
Story 4 — Sticker with a single CTA ("Get the template")
Don’t scatter CTAs across unrelated stories. Cluster them. Frequency matters: a benchmark for active creators aiming for conversion is 5–7 stories/day, but quality must remain high. Posting seven low-value stories dilutes urgency. The better cadence is concentrated value bursts—3–4 focused sequence stories tied to a single sticker repeatedly across the day.
Reels complicate this flow. Reels drive discovery; they are discovery-first, transactional-second. The optimal reel-to-subscriber pipeline treats Reels as top-of-funnel drivers and Stories as the conversion channel. Typical pipeline:
Reel creates visibility and profile visits
Viewer visits profile and sees the lead magnet tile
Viewer clicks bio link or sees a pinned story with a sticker
Visitor enters email
Here are common failure modes and why they occur.
What creators try | What breaks | Root cause |
|---|---|---|
Rely solely on Reels with a vague CTA in caption | High views, low subscriptions | Discovery intent not bridged to conversion; captions are low-salience |
Use multiple story stickers with different CTAs | Clicks split, opt-ins fall | Choice overload; unclear primary offer |
Drive traffic to a multi-option link page | Clicks but low opt-ins | Extra navigation, reduced immediacy |
Track conversions only via platform insights | Mismatch between click volume and email counts | Attribution loss across redirect chains |
In practice, the sequence that minimizes breakage is simple and repeatable: Reel → Profile (lead magnet visible) → Story sticker or bio click → one-field opt-in. Put the lead magnet tile where it's the least number of taps away. If you use a link-in-bio tool, select one that surfaces the lead magnet immediately and records traffic origin without manual UTM edits.
For creators who want specific sequencing examples, the ecosystem has targeted guides. If you’re experimenting with platform-specific funnels—like turning YouTube traffic into an email list—there are related playbooks that translate this logic across channels; for a YouTube-focused pipeline, see how to build an email list on YouTube. For TikTok, the tactics differ but the funnel principle is the same; see how to grow your email list on TikTok.
Tracking Instagram-to-subscriber conversion accurately: constraints, trade-offs, and implementation patterns
Tracking is where plans often unravel. Instagram provides limited referral detail in native analytics. Link shorteners help, but redirect chains and link-in-bio multi-option pages muddy attribution. If you rely solely on UTM parameters appended to bio links, you must rotate them manually and ensure every story sticker uses the same UTM pattern—error prone.
Practical alternatives exist. Some link-in-bio tools (and certain storefront-style tools) capture the source of the click at the moment of interaction and persist that source through the opt-in flow. That reduces the need for manual UTM setup. Conceptually: the tool records "story 1 sticker" or "bio tile click" as the source, then maps that to the email capture. This is particularly valuable for creators who want to understand micro-conversions without becoming analytics engineers.
Trade-offs are significant. Relying on a third-party tool for attribution ties you to their data model and retention practices. Using your own landing page with server-side tracking gives control, but adds development overhead and increases the chance of implementation bugs. Choose based on capacity: creators without engineering support should favor tools that automate attribution; creators building a full-stack funnel may prefer first-party capture with server-side events and email platform integration.
Below is a qualitative comparison of common tracking approaches used by creators.
Approach | Pros | Cons | When to use |
|---|---|---|---|
Third-party link-in-bio with built-in attribution | No UTMs; source captured per click; low setup | Data tied to vendor; potential reporting opacity | Creators without dev resources who need reliable source mapping |
Landing page with UTMs + GA/Server-side capture | Full control; flexible segmentation | Requires technical setup; easy to misconfigure | Creators ready to invest in a stable, owned funnel |
Email platform link tracking (post-opt-in) | Good for lifecycle metrics | Doesn’t show origin of first click reliably | When focus is on post-signup performance rather than acquisition attribution |
Many creators benefit from a hybrid approach: use a tool that captures click source and forwards that metadata to your email provider at signup. That keeps implementation light while maintaining attribution fidelity. If you want to evaluate email platforms that integrate well with this model, consult a practical comparison of creator platforms to decide which integrates with your chosen link strategy; an example resource is best email marketing platforms for creators in 2026.
One real constraint: Instagram's native Stories analytics aggregate clicks but do not attach unique identifiers to downstream events. That means if your opt-in is hosted off-platform, make sure your landing page can receive and persist a click identifier passed in the query string, or use server-side logs to reconcile clicks with signups. This is technical, but it's often the difference between guessing and knowing your conversion rate.
Common mistakes, operational checks, and a cadence for testing that actually moves the needle
Practice diverges from theory because creators treat link optimization as a one-time task. It isn’t. It’s operational. Below are the most frequent errors observed in audits and the corrective checks you can run in an hour.
Error 1 — Multi-CTA landing pages. Fix: Convert the primary tile into a single-offer page for at least two weeks. Run a controlled test: compare email counts week-over-week keeping post volume steady.
Error 2 — Poor sticker sequencing. Fix: Cluster story CTAs and repeat the same sticker across 3–5 stories in a single day. Track sticker impressions vs sticker clicks. If you see a wide drop between impressions and clicks, audit the visual prominence and copy of the sticker.
Error 3 — Over-collecting data. Fix: Ask for email only. Move optional fields to a second interaction inside the onboarding email.
Error 4 — No attribution. Fix: Use a link tool that surfaces the click source or implement a minimal server-side endpoint to receive click metadata. Then reconcile with email provider exports weekly.
Testing cadence: run a minimum-viable experiment using the scientific method—hypothesis, change, measurement, repeat. Example test plan for two weeks:
Week 1 baseline: current bio link, current story frequency, current opt-in copy.
Hypothesis: "If I make the lead magnet the primary tile and switch story sequences to 4 focused stories/day, opt-in rate will increase."
Week 2 test: single tile + 4 focused stories/day + simplified form. Measure email count and per-click conversion.
Analyze: If opt-ins increase, keep changes. If not, iterate on microcopy or the lead magnet itself.
Behavioral nuance: sometimes opt-in rates dip because your lead magnet doesn't match expectations set by the CTA. A common mistake is promising "email templates" but delivering a long PDF. Match format expectations: if you promise "3 email templates — copy + subject lines," deliver a 3-item, copy-and-paste set easily visible on mobile.
For guidance on designing opt-in pages that convert, study landing page examples that emphasize visible value and friction reduction. A good reference for specific page elements and examples is how to create an email opt-in page that converts.
Operational checklist: what to implement in the next 48 hours (practical, prioritized)
Two-day implementation windows force decisions and reveal unclear assumptions. Here's a prioritized checklist that a creator can do in 48 hours without engineering help.
Make the lead magnet the first tile in your link-in-bio tool. If you need inspiration for what qualifies as a lead magnet, review the rationale at what is a lead magnet and why every creator needs one.
Simplify the opt-in to email-only. Confirm the form is mobile-first and loads in under 2 seconds.
Record a 15–30 second Story that demonstrates the lead magnet (screenshot the product) and add a single link sticker. Repeat that sequence three times across the day.
Pin a highlight called "Free" that contains the sequence and sticker so profile visitors who don't catch Stories can still convert.
Ensure your link-in-bio tool or landing page captures click source metadata and forwards it to your email provider. If you’re using automation, review which parts can/should be automated; a practical primer is available at link-in-bio automation: what to automate and what needs human touch.
Don't forget to measure. Export email additions at the end of day two, compare with baseline, and watch conversion per click rather than raw click counts. If the tool you use integrates payments and product tiles, separate revenue metrics from acquisition metrics to avoid conflated decisions—see the difference in tools that support payments at link-in-bio tools with payment processing.
Finally, if you’re wondering whether it's time to leave a generic link-in-bio tool, there are concrete signals. Consider reviewing signs and alternatives in this practical guide: 7 signs it's time to ditch Linktree.
FAQ
How many stories should I post per day to see a measurable lift in signups?
Benchmarks for creators point to 5–7 stories/day as a general operating range, but effectiveness is driven by clustering. If those seven stories are unrelated, results flatten. Aim for 3–4 focused stories forming a conversion sequence (problem → proof → offer → sticker), repeated at intervals across the day so different follower cohorts see them. Track sticker click-throughs and measure opt-in per click rather than raw impressions; that's the more reliable signal.
Should I use a multi-link page or a single storefront tile if I sell products and want subscribers?
Prioritize subscribers early. A storefront-first single tile (lead magnet visible immediately) converts better for email capture. If you rely on direct sales, add product tiles beneath the lead magnet once your acquisition flow consistently generates subscribers. This staged approach balances revenue opportunities with list growth. If you later need to monetize directly from the profile, use the lead magnet as a prelaunch qualifier for paid offers.
How do I ensure accurate attribution between story sticker clicks and downstream emails?
Accurate attribution requires capturing the click source at the moment of interaction and persisting that metadata through the opt-in process. Use a link tool or landing page that appends an identifier to the signup payload or forwards click metadata to your email provider. If you cannot do that, use short-duration experiments where you drive only one channel at a time (e.g., only sticker-driven traffic for 48 hours) to approximate conversion. Long-term, prefer solutions that automate attribution rather than manual UTM rotation.
What lead magnet formats perform best for Instagram-driven subscribers?
Mobile-native, low-friction formats win: email templates, checklists, short swipe files, or a 3-email sequence that the subscriber can copy and use immediately. PDFs are fine but ensure the core value is visible on mobile without scrolling. Match format to promise: if you say "3 email templates," deliver three succinct templates in a mobile-friendly layout. For format ideas and why they work, see research on lead magnets and creator use-cases at what is a lead magnet and why every creator needs one.
How often should I A/B test bio CTAs and lead magnets?
Run tests long enough to gather meaningful data—usually two to four weeks per variant depending on traffic. A realistic cadence: one change per month for creators under 50K followers, because sample sizes are smaller and statistical noise is higher. Track per-click conversion, not just click volume. When you change both the CTA and the landing page simultaneously, you learn less; isolate variables when possible. If you need tactical guidance on conversion optimization, consult advanced tactics tailored for link-in-bio performance at link-in-bio conversion rate optimization.
Is it worth investing in a paid link-in-bio tool instead of free options?
Often yes, if the paid tool provides one of two capabilities you can't get elsewhere: consistent, tile-level click attribution or the ability to make your lead magnet the immediate visible element with fewer taps. Free tools can work, but they usually force trade-offs—ads, branding, or limited analytics. If you need payments and email integration in one place, evaluate payment-capable link tools to avoid stitching together multiple services; a helpful comparison is link-in-bio tools with email marketing.