


" height="21.95706114703747px" id="qM5sFNDIS" transform="translate(3.459 1.023)" width="17.081538493872166px"/></svg>)
" height="16.041644077985946px" id="vPwWmgEb7" transform="translate(2.375 4.207)" width="19.249983003077222px"/></svg>)
" width="20px"><path d="M 0 20 L 0 0 L 20 0 L 20 20 Z" fill="transparent" height="20px" id="Iu2kCeaUT" width="20px"/><path d="M 4.531 6.206 L 0.253 6.206 L 0.253 19.08 L 4.531 19.08 Z M 2.393 4.449 C 3.884 4.449 4.813 3.46 4.813 2.224 C 4.785 0.961 3.884 0 2.421 0 C 0.957 0 0 0.961 0 2.224 C 0 3.46 0.929 4.449 2.364 4.449 Z M 11.178 19.08 L 11.178 11.89 C 11.178 11.506 11.206 11.121 11.319 10.847 C 11.628 10.077 12.333 9.281 13.515 9.281 C 15.063 9.281 15.682 10.462 15.682 12.193 L 15.682 19.08 L 19.961 19.08 L 19.961 11.698 C 19.961 7.744 17.85 5.904 15.034 5.904 C 12.765 5.904 11.747 7.152 11.178 8.029 L 11.178 6.206 L 6.899 6.206 C 6.956 7.414 6.899 19.08 6.899 19.08 Z" fill="rgb(0, 0, 0)" height="19.079659942779543px" id="hzLTqQuQE" transform="translate(0.02 0.461)" width="19.960870207061767px"/></g></svg>)
" height="18px" id="TrPl6m2Z8" transform="translate(1.75 3)" width="20.5px"/></svg>)
Key Takeaways (TL;DR):
A successful one-day launch typically requires 3–6 hours of focused work covering copy, design, automation, and testing.
Drafting five essential copy blocks (headline, subhead, benefits, CTA, and confirmation) before opening a page builder prevents design fatigue and time loss.
Choosing the right tool is a trade-off: Carrd offers better design flexibility, while ConvertKit provides superior integrated email automation.
Technical oversights like DNS propagation for new domains or incorrect form field mapping can derail a same-day launch.
Rigorous testing is vital, including mobile responsiveness checks and verifying that tracking parameters (UTMs) persist through the signup flow.
One-Day Waitlist Launch Checklist: task-by-task timeline and what actually happens
If you need to set up waitlist landing page and publish it the same day, the checklist matters more than the tool. Below is a sequential workflow — the One-Day Waitlist Launch Checklist — broken into concrete tasks with realistic time estimates for a first-time builder. These aren’t optimistic "expert" times; they reflect a single person with basic comfort copying and pasting, who has an email account, a payment card, and a handful of 1‑line product descriptions ready.
Task | Estimated time (first-timer) | Why it takes that long |
|---|---|---|
Write five essential copy blocks (headline, subhead, benefit bullets, call-to-action, confirmation message) | 30–60 minutes | Clear value proposition takes editing; you’ll iterate once you see it in the builder |
Choose builder and template, create page skeleton | 15–30 minutes | Decision friction and template scanning consumes time |
Build form and layout in Carrd or ConvertKit | 15–45 minutes (Carrd); 30–60 minutes (ConvertKit) | Carrd is faster for simple designs; ConvertKit has more built-in email wiring |
Connect form to list and create initial automation/welcome email | 20–45 minutes | Mapping fields, testing triggers, and writing the first email take time |
Create and link confirmation/thank-you page | 10–25 minutes | Designing expectation-setting content and copying the URL into the form |
Basic analytics, Tapmy attribution, and UTM check | 15–30 minutes | Installing pixels, verifying events, and confirming source attribution |
Mobile responsiveness and clickflow QA | 10–20 minutes | Screen sizes, button tap targets, and keyboard behavior |
Publish and announce across 2–3 channels | 15–40 minutes | Composing messages, shortening links, and scheduling first posts |
Altogether, plan for about 3–6 hours as you learn. If you have to build both a custom design and a segmented automation, it will push you toward a full day. The point: you can build a working pre-launch landing page in one day, but a reliable one that captures clean attribution and sends the right first email needs procedural attention.
Write the five essential copy blocks before opening the builder (30–60 minutes saves hours)
Starting the build without copy is a common time sink. Drafting five essential blocks first dramatically shortens iteration in the visual editor and stabilizes your testing later.
Headline: a single sentence that says who this is for and the main benefit.
Subhead: one clarifying sentence that explains the promise in concrete terms.
3 benefit bullets: each 8–12 words; avoid feature laundry lists.
CTA label: the exact button text and a fallback confirmation line.
Confirmation page copy: set expectations — timeframe, next email, and a small action (share, follow, or save).
Write them in sequence. Then step away for 10 minutes and edit. You’ll likely cut 20–40% of the words. Keep the confirmation page text pragmatic: winners are specific about timing (e.g., “We’ll email your invite in mid‑June”) rather than vague promises.
If you need examples or UX patterns, the parent strategy article explains broader positioning choices; that’s useful context if you’re debating scarcity vs. open signup (Waitlist strategy).
Build a Carrd waitlist page in 30 minutes — what actually trips people up
Carrd is a common pick for creators who want to set up waitlist landing page quickly. It’s visual, cheap, and forgiving. But speed can disguise fragility: small oversights lead to missed emails and broken source tracking.
Step-by-step, with traps noted:
Choose a one-column template. Minimalism reduces design decisions. Don’t pick multi-section templates unless you plan content beyond signup.
Paste your headline, subhead, and bullets into blocks. Use consistent spacing — Carrd’s visual spacing can look fine on desktop but break on mobile.
Add a Form element. Map fields: email, name (optional). Most people add extra fields; avoid that on day one. Extra fields reduce signups and increase validation errors.
Configure the form action: Carrd supports native integrations and webhook endpoints. If you’re using ConvertKit or another ESP, choose the native integration. If you’re connecting via webhooks, test with a request inspector tool before publishing.
Set up the form’s success behavior: redirect to a confirmation URL rather than showing inline text. Redirects are easier to debug and allow you to add tracking on the confirmation page.
Publish to a Carrd domain or a custom domain. If using a custom domain, DNS changes can take time — plan for propagation (up to 24 hours). For one-day launches, publish on the provider’s subdomain if speed matters.
Common failure modes and fixes:
What people try | What breaks | Why |
|---|---|---|
Add name, location, industry fields | Form submits fail or require custom JS | Extra fields often need different mappings in the ESP; default integrations only expect email |
Use Carrd’s native redirect without testing | Confirmation URL doesn’t receive UTM or tracking parameters | Redirects can strip query strings; unless configured, you lose source data |
Publish to a new custom domain | Page inaccessible for early traffic | DNS TTL and propagation cause delays — your “one day” becomes uncertain |
Practical troubleshooting checklist when building fast in Carrd:
Test with three emails: your personal, a colleague, and a throwaway address. Confirm the ESP receives the subscriber.
Open the published URL in an incognito mobile browser and try a signup. Walk through the confirmation page.
Use the browser console and network tab to see if the form request returns a 200/302. If it returns 400 or 0, re-check the endpoint and field names.
If you want a broader inventory of low-cost builders and trade-offs beyond Carrd, the free tools guide lists options and when to pick them (free tools for waitlists).
Build a ConvertKit landing page and wire automation — expectations vs reality
ConvertKit blends page building and email automation. For creators who prefer an integrated stack, it often shortens the connect-and-test loop. That said, ConvertKit’s landing pages are not flexible design-wise; they prioritize deliverability and email flow. If your priority is to build waitlist page step by step with a reliable automation, ConvertKit is a sensible choice — once you understand its constraints.
Practical build steps with realistic gotchas:
Create a new landing page. Choose the “signup” layouts to ensure the CTA maps to a default form structure.
Paste your copy blocks; keep the visual hierarchy simple. ConvertKit removes some spacing options, so your copy will reflow differently than in Carrd.
Open the form editor tied to the landing page. The form is the automation anchor — name it clearly (e.g., “Waitlist — homepage”).
Connect the form to a sequence with an immediate welcome email. ConvertKit sequences are simple but powerful; place a 0–1 minute delay to avoid deliverability flags from rapid consecutive sends.
Set the confirmation behavior: ConvertKit supports double opt-in in some locales. Decide whether to enable double opt-in. Single opt-in increases immediate signups but may increase spam complaints; double opt-in reduces list growth speed.
Where people trip up:
Assuming ConvertKit auto-tracks source without explicit UTMs. It records referrer headers, but those can be missing for social apps or if redirects remove them.
Expecting page templates to match brand fonts. ConvertKit uses a simplified styling set; if brand fidelity matters, plan a custom domain and CSS work or use Carrd + webhook instead.
Not creating a dedicated sequence for initial welcome messaging. The first email should confirm expectations and deliver value — don’t rely on an old generic broadcast.
For wiring that actually works on day one, test the entire flow: submit, receive the welcome email, and verify the subscriber appears in the correct tag/segment. If you’re unsure about your welcome email, the Tapmy sibling piece on welcome emails gives patterns and sample copy that hooks new subscribers (waitlist welcome email).
Connect form → list → confirmation: where automation fails and how to fix it
The technical path from a signup to a stored subscriber and a sent email seems linear. It isn’t. Real systems introduce three choke points: field mapping, trigger logic, and deliverability rules. Understanding the failure modes exposes simple fixes.
Field mapping failures are the most common. If your form sends a POST but field names don’t match the ESP’s expectation, the ESP either rejects the request or creates a partial profile without the email. When you build waitlist page step by step, explicitly confirm that the POST payload includes an "email" key and that the value is a valid email string.
Trigger logic failures appear when the automation rule doesn’t fire because the subscriber lacks the tag you used as a trigger or because double opt-in is enabled. Test by submitting the form with three different addresses and watching the automation logs. If one goes through and another doesn’t, check whether the ESP is throttling for duplicate emails or flagged domains.
Deliverability rules are subtle and expose themselves later: welcome email bounces, sits in spam, or your provider applies a sending limit. On day one, use a short, plain-text welcome email with minimal links and no heavy images. That reduces the chance of triggering spam filters and ensures your first engagement metrics are reliable.
Symptom | Immediate test | Fix |
|---|---|---|
No subscriber appears in the list | Check server response when the form submits (200 vs 4xx) | Correct API keys/endpoint, ensure field names match, re-test |
Subscriber appears but automation doesn’t run | Inspect subscriber tags/segments | Adjust automation trigger to “tag added” or change form to add tag |
Welcome email lands in spam or not received | Check bounce logs and SPF/DKIM setup | Use provider’s domain settings or switch to plain-text minimalist email |
Don’t skip the confirmation page. A redirect to a dedicated confirmation URL serves three purposes: it reassures the user, it provides a place to add tracking pixels and Tapmy attribution checks, and it lets you measure the conversion without client-side form JavaScript interfering. If you want ideas for confirmation page copy and how to set expectations, the pre-launch email sequence guide includes examples you can repurpose (pre-launch email sequence).
Mobile testing checklist and day-one analytics — get useful data immediately
Mobile is non-negotiable. Most creators will see the majority of initial traffic from mobile — links shared on social, Instagram, Twitter/X, TikTok. A page that looks fine on desktop but fails on mobile will tank your early conversion rate, which matters when you’re trying to validate demand fast.
Mobile testing checklist (quick, actionable):
Open the public URL on an Android and iOS device (or BrowserStack). Try the entire signup flow.
Ensure the email field autofocuses and the on-screen keyboard doesn’t hide the CTA.
Check tap target sizes for the CTA (minimum 44×44 CSS pixels recommended).
Confirm the confirmation page is reachable and loads without blocking scripts.
Test with slow network throttling (3G) to see perceived performance and drop-off.
Analytics on day one should answer two immediate questions: where are my visitors coming from, and what fraction complete the signup? If you try to bolt on a complex analytics stack on day one, you’ll either misconfigure something or not finish. Prioritize these essentials:
Page view tracking (server or client) on the landing page and confirmation page.
Event for "form_submit" or "signup_complete" fired on the confirmation page load.
Source attribution recorded for each signup — referral, channel, campaign.
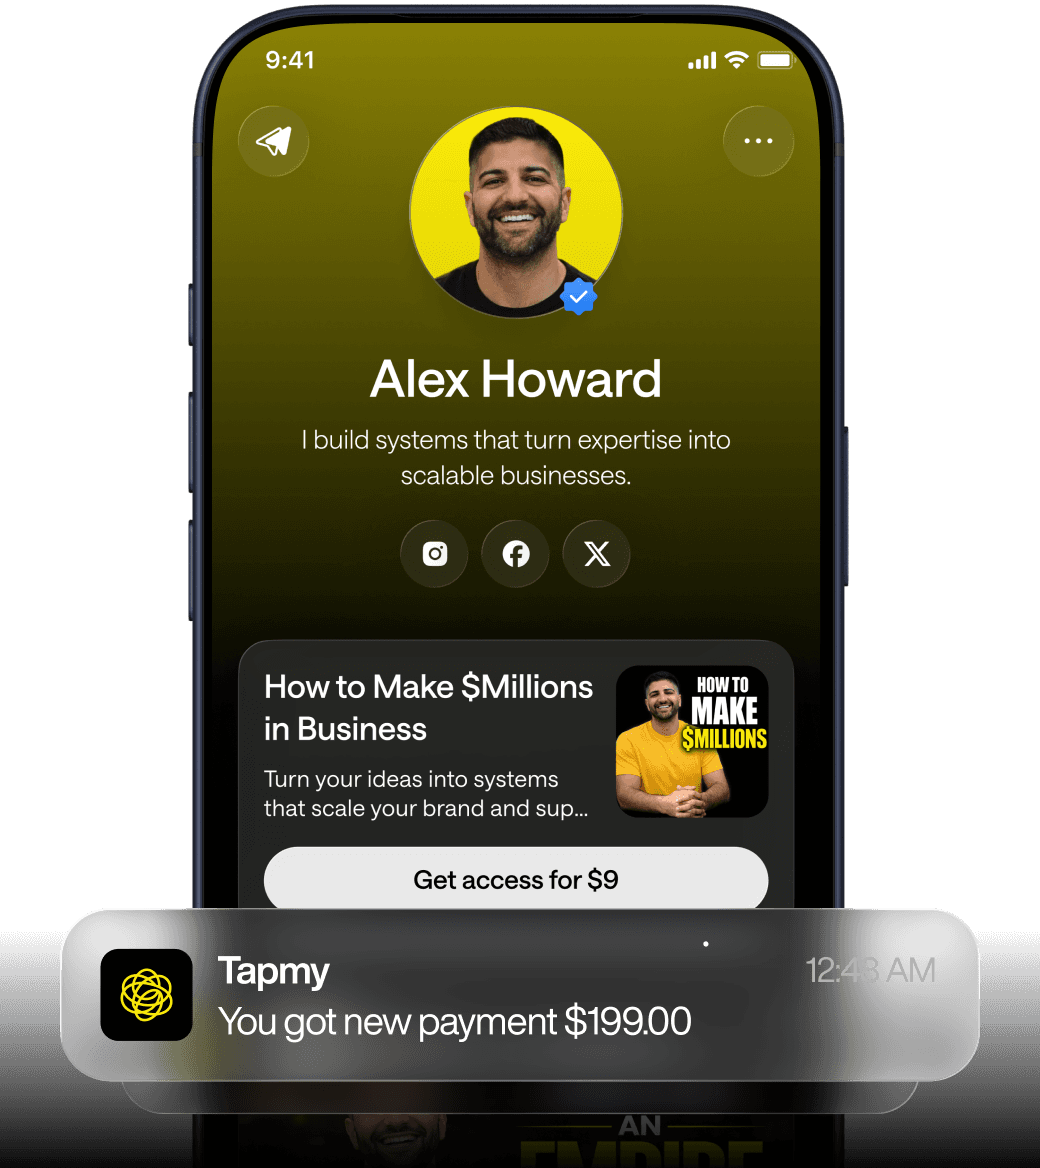
Here’s where Tapmy’s framing matters. The monetization layer is attribution + offers + funnel logic + repeat revenue. Tapmy’s unified link and attribution setup means creators can publish a waitlist page and have source tracking active from the first visitor without manual UTM tagging. That reduces the early-data noise you would otherwise get from missing or stripped referrers — a common problem when traffic comes from mobile apps and social embeds.
Practical analytics checklist for the first 24 hours:
Verify page views and form submits appear in your analytics dashboard. If using a lightweight analytics tool, it should show both events within minutes.
Cross-check source attribution: do signups include a source (email, organic social, paid)? If referrers are blank, check redirects and whether the button used an href that strips query strings.
Inspect one or two real signups in your ESP to confirm the captured source metadata matches analytics.
If you plan to iterate on conversion rate quickly, review the A/B testing primer on choosing variables and running quick experiments (A/B testing waitlist pages).
Decision matrix: Carrd vs ConvertKit vs a fuller stack — choose for the day, not the dream
Picking a tool should match a timeline and risk profile. Below is a decision matrix that contrasts the three common approaches for creators who need to build waitlist page step by step within a day.
Need | Carrd (fast visual) | ConvertKit (integrated email) | Full stack (custom domain + analytics + referral) |
|---|---|---|---|
Time to publish (first-timer) | ~30–90 minutes | ~60–120 minutes | Half-day to multiple days |
Reliability of form-to-email flow | Good if native integration used; webhooks add complexity | High — built-in sequences and tags | High, but requires correct configuration (API keys, webhooks) |
Control over tracking and attribution | Limited unless you add tracking pixels and handle query strings | Moderate; referrer headers may be dropped by social apps | Best — can centralize attribution and use a link layer |
When to pick it | You need speed and a clean simple page | You want integrated email automation and minimal wiring | You need referral programs, advanced analytics, or payment logic |
Decision rules of thumb:
If you want to launch this week and validate demand quickly: pick Carrd or ConvertKit and follow the one-day checklist. Keep it small.
If you have a team and referral mechanics planned: plan for a fuller stack, but don't delay launch waiting for the perfect referral system.
Instrument attribution from day one — even simple referrer capture beats missing source data later. Tapmy’s unified attribution approach removes the need for immediate UTM gymnastics if you integrate it as your link layer.
For creators debating which stack to use across multiple launch styles, there are detailed comparisons and deeper optimization articles that explore conversion focus, referrals, and paid ads strategies. If you need rapid audience growth without an existing list, review growth tactics that pair well with a one-day launch (grow a waitlist fast), or if you plan to use paid channels, read the paid-ads playbook (paid ads for waitlists).
What breaks in real usage — repeated failure patterns and mitigation
Builders who rush produce repeatable failure patterns. I’ve seen the same three problems across dozens of launches. They are not exotic. They are mundane and preventable.
Failure pattern 1: Lost attribution. You publish, you get a handful of signups, and when you try to understand where traffic came from, all the referrers are blank or “direct”. Why? Links you shared were copied into apps that remove query strings, or redirects stripped UTMs. Mitigation: use a link layer or Tapmy-like unified attribution that preserves source information at the first click and reattaches it to the signup.
Failure pattern 2: Automation misfires because of double opt-in or missing tags. The fix is procedural: create a test script and confirm that a new signup triggers the specific sequence you intend. Do not rely on “it worked for me” from an account owner; test with multiple inboxes and domains.
Failure pattern 3: Mobile form usability fails. Buttons are not visible when the keyboard is open. People abandon. Fix by testing on actual devices and ensuring the CTA is placed above fold on the narrowest expected viewport.
When things go wrong, trace from the end user back: confirmation page → POST request status → ESP logs → automation trigger. That order reveals which component failed rather than guessing.
If you want deeper tactical playbooks for improving headline conversions and email copy that converts signups into buyers, consult the conversion and copy resources (high-converting waitlist page, waitlist email copy).
Implementation patterns and examples: quick workflows that work
Here are two practical day-one workflows you can follow depending on tool choice. Both prioritize capturing attribution and sending a welcome email.
Workflow A — Carrd + ESP (fast, visual)
Draft the five copy blocks (30–60 min).
Create a Carrd page on a provider subdomain and add a simple form (15–30 min).
Use the ESP’s native integration or a Zapier webhook if native isn’t available (20–30 min).
Set form to redirect to confirmation URL with a query string preserved. Add pixel on confirmation page (10 min).
Send a test signup, verify email, verify source in analytics (10 min).
Workflow B — ConvertKit integrated (consistent email flow)
Draft the five copy blocks (30–60 min).
Create ConvertKit landing page and associated form (30–60 min).
Connect form to sequence and tag. Create a one-line welcome email that sets expectations (20 min).
Publish on ConvertKit domain, test signup flow, and confirm tag + email delivery (15 min).
Both workflows should include a final “publish and announce” step: post the link to two social channels and one community you control. Use the same link layer for every channel to preserve attribution. If you need creative ways to promote without paid ads, the social content playbook outlines repeatable content patterns (social content for waitlists).
FAQ
How long will the first welcome email take to reach new subscribers, and should I expect delays?
Typically, welcome emails sent by ESPs reach recipients within seconds to a few minutes. Delays occur when the provider queues messages because of sending limits, or if you’ve enabled double opt-in and are waiting for the user to confirm. On day one, assume a few minutes and test with multiple providers and inboxes. If you see consistent multi-minute delays, check your ESP’s sending limits and whether your message contains elements that trigger throttling (large images, excessive links).
Do I need to set up SPF/DKIM on day one to send a welcome email?
Not strictly. Many ESPs will send on your behalf using their domains and default sending settings, which is fine for testing. However, if you plan to scale quickly, set up SPF/DKIM as soon as possible to improve deliverability and reduce the chance your emails land in spam. If you’re using a provider’s subdomain, prioritize testing the flow first and add DNS auths in parallel.
What if my first-day signups come mostly from a single social post — does that skew analytics?
Yes. Early data is noisy. A concentrated spike from one post will bias conversion and source metrics. Treat day-one data as directional: use it to uncover technical problems (broken forms, missing emails) and to see whether the core message resonates. Only after you’ve run at least a few distinct channels or posts should you draw robust conclusions about conversion rates. If attribution is missing or unclear, consult tools or methods that preserve source at the click, rather than relying solely on UTMs.
Should I enable referral incentives on day one?
Referral programs are effective but add complexity. If your goal is to validate demand fast, launch without referrals to reduce variables. If you need viral reach from the outset and can configure referral tracking correctly, consider a light-weight referral layer, but only if you can test and verify attribution. Otherwise, add referrals after the basic flow is stable. There are dedicated guides to using referral programs for waitlist growth if you want to explore that next (referral programs).