


" height="21.95706114703747px" id="qM5sFNDIS" transform="translate(3.459 1.023)" width="17.081538493872166px"/></svg>)
" height="16.041644077985946px" id="vPwWmgEb7" transform="translate(2.375 4.207)" width="19.249983003077222px"/></svg>)
" width="20px"><path d="M 0 20 L 0 0 L 20 0 L 20 20 Z" fill="transparent" height="20px" id="Iu2kCeaUT" width="20px"/><path d="M 4.531 6.206 L 0.253 6.206 L 0.253 19.08 L 4.531 19.08 Z M 2.393 4.449 C 3.884 4.449 4.813 3.46 4.813 2.224 C 4.785 0.961 3.884 0 2.421 0 C 0.957 0 0 0.961 0 2.224 C 0 3.46 0.929 4.449 2.364 4.449 Z M 11.178 19.08 L 11.178 11.89 C 11.178 11.506 11.206 11.121 11.319 10.847 C 11.628 10.077 12.333 9.281 13.515 9.281 C 15.063 9.281 15.682 10.462 15.682 12.193 L 15.682 19.08 L 19.961 19.08 L 19.961 11.698 C 19.961 7.744 17.85 5.904 15.034 5.904 C 12.765 5.904 11.747 7.152 11.178 8.029 L 11.178 6.206 L 6.899 6.206 C 6.956 7.414 6.899 19.08 6.899 19.08 Z" fill="rgb(0, 0, 0)" height="19.079659942779543px" id="hzLTqQuQE" transform="translate(0.02 0.461)" width="19.960870207061767px"/></g></svg>)
" height="18px" id="TrPl6m2Z8" transform="translate(1.75 3)" width="20.5px"/></svg>)
Key Takeaways (TL;DR):
Why a lone URL rarely converts: the failure mechanics behind single-link bios
A single raw affiliate link in your bio can work for impulse purchases, but it systematically underperforms when you want predictable affiliate revenue. The mechanism is simple: followers arrive with context from a post or story; they need a tiny piece of interpretive work to map that context to a destination URL. If that mapping is missing, they hesitate. Hesitation kills conversion.
At a systems level, think of each visitor as progressing through the Context-Click-Convert model: they need one line of context, a clear visual click target, then a tracking-enabled destination. A lone URL often supplies only step three — a destination — and leaves steps one and two to chance. The result is lower click-through rate (CTR) and a lower click-to-sale conversion because visitors aren’t primed with product cues or a reason to click.
Practically, creators using basic link hubs (the tools that simply list URLs) see predictable patterns: pages with 3–5 focused offers that include brief context lines convert better than pages with 10+ unannotated links. The cause is cognitive overload plus a lack of context. That observation is supported by behavior patterns across creators who upgraded their link pages for offers — not through marketing claims, but through consistent comparative results collected during audits.
If you want the short cause-and-effect: bare links force users to infer intent. Annotated, offer-driven blocks reduce inference and increase the probability of click and purchase. For background on converting creator funnels without a website, see the broader strategy discussed in the pillar analysis at affiliate revenue without a website.
Designing the offer block: what each affiliate entry must include
One offer per row. That’s not a stylistic preference — it’s a conversion rule. Each row should contain three tightly defined elements aligned with the Context-Click-Convert model:
One-line context: a single short sentence that ties the offer to a creator’s post, use-case, or a benefit.
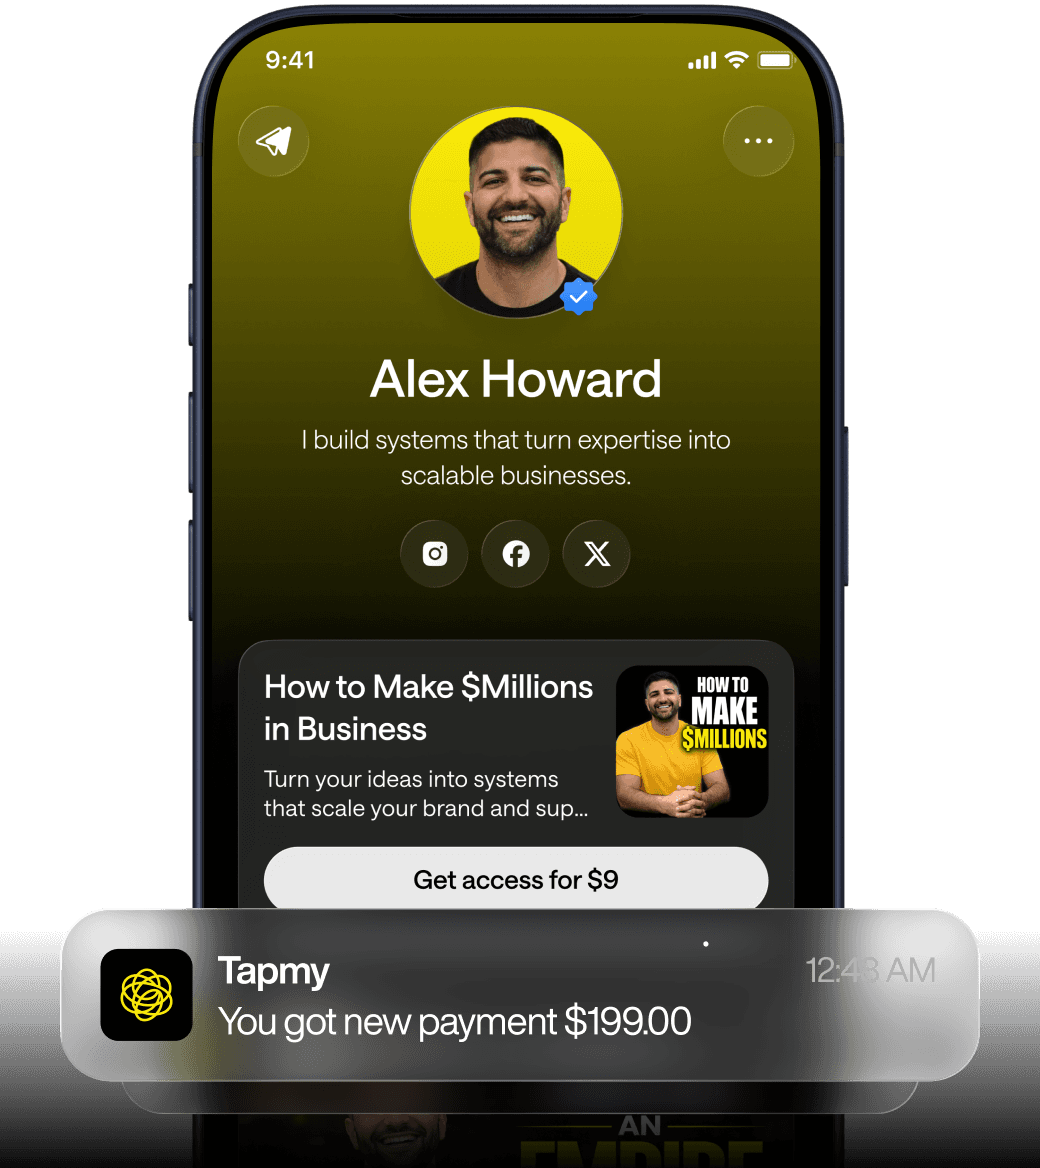
Visual CTA: a button or card that stands out from surrounding text and looks touchable on mobile.
Tracking link: a URL instrumented with UTM parameters or link-hub-level tracking so you can attribute outcomes.
Breaking down each element reveals why it matters.
One-line context. This is not a full product review. It’s a micro-context: "For sore knees after running — recommended brace" or "cheaper alternative to X I use weekly." Context sets intent. Without it, users ask themselves whether the product is relevant. A concise context line reduces decision friction.
Visual CTA. On mobile, touch targets have to be obvious and forgiving. Text links work in a pinch, but they blend into scrolling. A button-sized element with a contrasting color increases perceived click affordance. Buttons also structure mobile layout: they create predictable hit zones when users are navigating with a thumb.
Tracking link. The tracking pointer is the data backbone. If you can’t trace clicks to offers you can’t optimize. That data informs which contexts perform and which CTAs fail.
Below is a compact checklist you can apply to every offer block before you publish your page.
Offer Element | Minimum Requirement | Why it matters |
|---|---|---|
One-line context | 6–12 words referencing product use or benefit | Aligns visitor intent with product relevance; reduces bounce |
Visual CTA | Button or card with clear verb phrase | Improves mobile tap-rate and perceived clickability |
Tracking | UTM or link-hub ID on every target | Enables attribution and iterative optimization |
How many affiliate links should live in your bio — and how to organize them
Creators often make two parallel mistakes: too few offers (one or two uncontextualized URLs) or indiscriminate dumping of every affiliate link they have. Both are suboptimal. The practical sweet spot for a dedicated affiliate page is typically three to five well-organized offers per viewing surface.
Why that range? It hits two cognitive limits. First, choice overload: beyond roughly five options, people slow down and are likelier to abandon. Second, attention economics on mobile: you have a few seconds of visible real estate to persuade. Fewer, clearer choices increase the probability that a user will scan, understand, and tap.
Organization matters as much as count. There are two dominant organizational patterns used by effective creators:
Category-driven: group offers by product type (e.g., "Running Gear", "At-Home Audio") — useful if your audience spans multiple needs.
Campaign-driven: group offers by content campaign or post series (e.g., "Marathon Training Week", "Holiday Gift Picks") — useful when a post or Ad directs to a campaign-specific page.
They are not mutually exclusive. Problem arises when creators mix both schemes on the same surface without visual hierarchy. That produces a semantic jumble: users can’t map content visits to offers quickly.
The table below lays out decision logic: when to use category vs campaign organization and what typically breaks in each approach.
Organization | When to use | Common failure mode |
|---|---|---|
Category-driven | Broad audience with recurring product verticals | Options proliferate; becomes a directory, not an offer page |
Campaign-driven | Traffic is campaign-specific (single post or series) | Old campaigns linger and confuse new visitors |
Hybrid (segmented) | Large catalog but you promote specific categories per post | Requires clear visual sections; if not, it looks cluttered |
Operational rule: match the organization to the traffic source. If a link in your Instagram carousel points to "best travel gear", the destination should surface travel-related offers first. For a campaign-driven post sequence, temporarily re-order or feature the campaign’s offers top-of-page.
If you want tactical examples and step-by-step flows for Instagram and other platforms, there are practical guides you can reference, including a detailed walkthrough for Instagram creators at Affiliate marketing on Instagram without a website and a piece on TikTok-specific patterns at TikTok affiliate marketing strategies.
Visual choices that affect conversion: images vs text links, above-the-fold, and mobile constraints
On mobile, visual hierarchy and load time are the primary levers you can pull. Users judge pages within milliseconds; perceived speed, clarity of CTA, and image placement shape that judgment.
Images are powerful but ambiguous. A product image can increase recognition and convey aspirational value. But images also add weight: they slow rendering, create layout shifts when they load late, and can distract from the CTA if they dominate the viewport.
Text links are lightweight and load instantly. They convert less frequently per impression than a button+image combo, but they’re far safer when your page has limited bandwidth. The right compromise is a small thumbnail or icon paired with a bold CTA line. That preserves visual affordance while keeping load times manageable.
Mobile placement: prime real estate is the first screenful — the above-the-fold area. Position the highest-converting, campaign-relevant offer there. Below the fold you can include secondary recommendations, educational micro-copy, or a “more offers” section for users who want to explore.
Hard numbers are noisy across platforms, but platform audits repeatedly show two clear correlations worth operationalizing:
Pages that render fully under 2 seconds get measurably higher engagement. That’s a trade-off: crisp visuals versus speed.
Users are more likely to tap large, button-shaped CTAs placed above the fold on the first two screenfuls.
When choosing a link-hub platform, examine whether it optimizes images for mobile, supports lazy-loading with a proper placeholder to avoid layout shift, and allows you to promote an offer at the top quickly. If you want comparative context about platform decisions, review a qualitative comparison between link tools and selling-focused pages at Linktree vs Stan Store, and see why many creators change platforms in the analysis at why creators are leaving Linktree.
Testing and tracking when you don’t have a full website
Creators without a website still need to A/B test. The goal is to know which offer copy, CTA phrasing, or image leads to higher click-to-sale performance. There are three pragmatic tracking approaches, each with trade-offs:
UTM parameters appended to affiliate links — simple, compatible with ad platforms, and easy to parse in spreadsheets;
Link-hub-level tracking — the link hub provides clicks-per-offer and basic conversion attribution if it supports postbacks;
Redirect landing snippets — tiny hosted pages that sit between your bio and the merchant, where you can run experiments but must manage load and compliance.
The table below contrasts these options so you can choose based on your constraints and goals.
Method | Pros | Cons | When to choose |
|---|---|---|---|
UTM parameters | Simple, platform-agnostic, transparent | Merchant dashboards may drop UTMs; requires manual stitching to sales | Good when you have analytics or ad-platform data to combine |
Link-hub-level tracking | Per-offer clicks and basic conversions without extra pages | Dependent on the link-hub’s fidelity and attribution model | Useful for rapid iteration when you want per-offer metrics |
Redirect landing snippets | Full control over experiments and pixel placement | Increases friction, adds maintenance, can trigger merchant policy issues | Choose when you must run creative experiments or capture custom events |
Start with link-hub tracking and UTMs in parallel. Use the hub’s per-offer metrics to prioritize tests; then validate lifts with downstream attribution where possible. If you don’t have an analytics suite, a spreadsheet that combines UTM-tagged conversions and affiliate payout reports will suffice for early experiments.
Note on policy: when you append tracking information or introduce redirect pages, double-check merchant and platform policies about link modification. There are scenarios where cloaking or certain redirect behaviors can result in affiliate link rejection or social platform flags. For guidance on safe sharing of affiliate links across social platforms, see this practical guide at how to share affiliate links on social media.
What breaks in practice: real failure modes and recovery patterns
Systems rarely fail cleanly. Here are typical failure modes encountered when creators migrate from a simple link-in-bio to a conversion-focused affiliate page, with evidence-backed root causes and corrective actions.
1. The “everything” page. Symptoms: long list of links, poor CTR per item. Root cause: mixed organizational intent and cognitive overload. Recovery: prune to 3–5 offers per view; create separate campaign pages for time-bound promotions. (You can still host an archive, but hide it behind a "more" action so it doesn't compete visually.)
2. The mismatch between post and destination. Symptoms: high bounce rate after click; low purchase rate. Root cause: traffic sent to a general offers list rather than a context-matched offer. Recovery: use link-hub tools that allow reordering by campaign or use temporary pinned offers for active post campaigns.
3. Tracking gaps. Symptoms: clicks recorded but no revenue attribution; inability to compare offers. Root cause: inconsistent or missing UTMs, merchant dashboards that strip query strings, or reliance on raw clicks only. Recovery: instrument every offer with consistent UTM naming; maintain a manual reconciliation process between clicks and payouts until automated attribution improves.
4. Visual clutter on slow networks. Symptoms: layout shifts, buttons jumping, images loading late. Root cause: heavy images without placeholders or CDN optimization. Recovery: use compressed thumbnails, choose platforms that support lazy-loading placeholders, and prefer text + small icons if you can’t guarantee load speed under 2 seconds.
Below is a practical mapping of "what people try → what breaks → why" that helps prioritize immediate fixes.
What people try | What breaks | Why | Quick fix |
|---|---|---|---|
Dump all affiliate links on one page | Lower CTR and conversion per offer | Decision fatigue and unclear context | Reduce visible offers; add "more" expansion |
Use full-size product images | Slow rendering and layout shift | Large assets without optimization | Swap to thumbnails and compress images |
No UTMs or tracking | Can't tell what drives revenue | Missing attribution layer | Standardize UTMs and use link-hub metrics |
One last reality check: fixes can interact poorly. Pruning offers increases per-offer CTR but can reduce total clicks if you remove genuinely high-performing long-tail items. Experimentation and data are necessary; there is no universal switch. For a deeper look at what creators often miss in monetizing their bio links, see bio link monetization hacks.
Operational playbook: a prioritized checklist to implement over a week
You don’t need to rebuild your entire presence in a day. Below is a practical, prioritized week-long sequence you can follow. The goal is to create measurable change while keeping risk low.
Day 1 — Audit and prune. Identify top 10 affiliate links by past revenue or perceived strategic value. Keep top 3–5 visible. Remove or archive the rest.
Day 2 — Write context lines. Draft a single-line context for each visible offer. Keep it tight: 8–12 words. Ask a friend whether it clarifies the offer within two seconds.
Day 3 — Implement visual CTAs. Convert text links into button-like elements. Prioritize contrast and thumb reach on mobile.
Day 4 — Instrument tracking. Add UTMs and ensure link-hub tracking is on. If your platform supports per-offer analytics, enable it.
Day 5 — Speed check. Measure page load on a mobile device and target sub-2-second render for above-the-fold content. Replace large assets as needed.
Day 6 — Traffic alignment. Update post captions and pinned posts to reference the exact offer title and context used on the page.
Day 7 — Short experiments. Run one A/B test: CTA copy A vs CTA copy B, or image vs no-image for a single offer. Monitor clicks and reconcile with payouts after two conversion cycles.
If you want templated CTAs to test quickly, there’s a library of examples with tested phrasing at 17 link-in-bio CTA examples. For creators selling digital products from their bio, some patterns overlap and are explained practically at how to sell digital products directly from your bio link.
Monetization layer and platform choice: aligning attribution, offers, funnel logic, and repeat revenue
When we talk about link pages that actually behave like landing pages, it helps to use a compact framing: monetization layer = attribution + offers + funnel logic + repeat revenue. It’s a functional equation, not marketing copy.
Attribution: you need to know which atomic offer drove a click and eventual purchase. Offers: each must be a self-contained unit with context and CTA. Funnel logic: order and routing that match the traffic source. Repeat revenue: hooks that encourage customers to return.
Platform choice matters because not every link-hub treats these elements as first-class. Some tools are primarily link routers; others are built for offer-driven pages and can provide per-offer conversion data, campaign pinning, and CTA controls. For practical considerations when evaluating tools, read the creator-focused product comparisons and strategy pieces such as conversion optimization for creators at conversion rate optimization for creator businesses and a focused piece on analytics you should track at bio link analytics explained.
Operationally, creators who invest a bit more in a platform that supports per-offer performance (i.e., the "offers" and "attribution" parts of the equation) can iterate similarly to paid advertisers: swap copy on a high-demand offer, re-run, and measure payout delta. Platforms that treat your link page as an offer hub, exposing performance per card, let you optimize the same way a landing page designer would optimize an ad-to-landing funnel.
For creators and small teams deciding whether to stick with simple link routers or move to offer-first platforms, consider reading comparative case studies on platform fit for creators, influencers, and freelancers at these pages: creators, influencers, and freelancers. They outline different workflow trade-offs relevant to your decision.
FAQ
How many affiliate links should I include if most of my audience is mobile and coming from short-form video?
Keep the visible surface to 3–5 offers that are tightly matched to the content you’re promoting. Short-form viewers are task-oriented; they need context and a direct CTA within the first screenful. Use campaign-driven ordering for videos and temporarily pin the promoted offer to the top. Keep other offers accessible but collapsed so they don’t distract.
Do product images always improve conversion on bio link pages?
Not always. Images increase recognition and aspirational value but add loading cost and can cause layout shift. If your page can render above-the-fold within ~2 seconds, a small thumbnail plus a strong CTA usually improves engagement. If you can’t guarantee that speed, choose text + icon to ensure stable rendering.
What’s the simplest reliable way to track which offer drives affiliate revenue without a website analytics suite?
Combine consistent UTM tagging for each offer with per-offer click metrics from your link-hub. Reconcile UTM-labeled sales reports from affiliate dashboards (or merchant payout reports) with click counts. It’s manual at first, but it provides the signal necessary to prioritize tests until you can automate attribution with postbacks or deeper integrations.
Should I organize links by category or by content campaign if I create varied content weekly?
Match organization to the traffic driver. Use campaign-driven ordering for weekly content that sends specific traffic (pin those offers during the campaign), and maintain a separate, stable category section for evergreen offers. Avoid mixing both without clear visual sections; that causes semantic noise for users and dilutes conversion intent.
When running A/B tests on a bio link page, what should I test first?
Start with the highest-impact, low-friction elements: CTA copy and the one-line context for your top-performing offer. Those changes are easy to roll back and typically produce detectable differences quickly. After that, test visual presence (thumbnail vs no thumbnail) and button color or size. Avoid full-layout experiments until you have a baseline of click-to-purchase data to validate improvements.